What the system provides
In a single dashboard, you can prepare a guest menu, organize request handling, manage stays, and view a summary of services. Guests get a clear way to contact the hotel, while the team gets a shared task list with assignees and change history.
First launch
Step 1. Log in to the dashboard
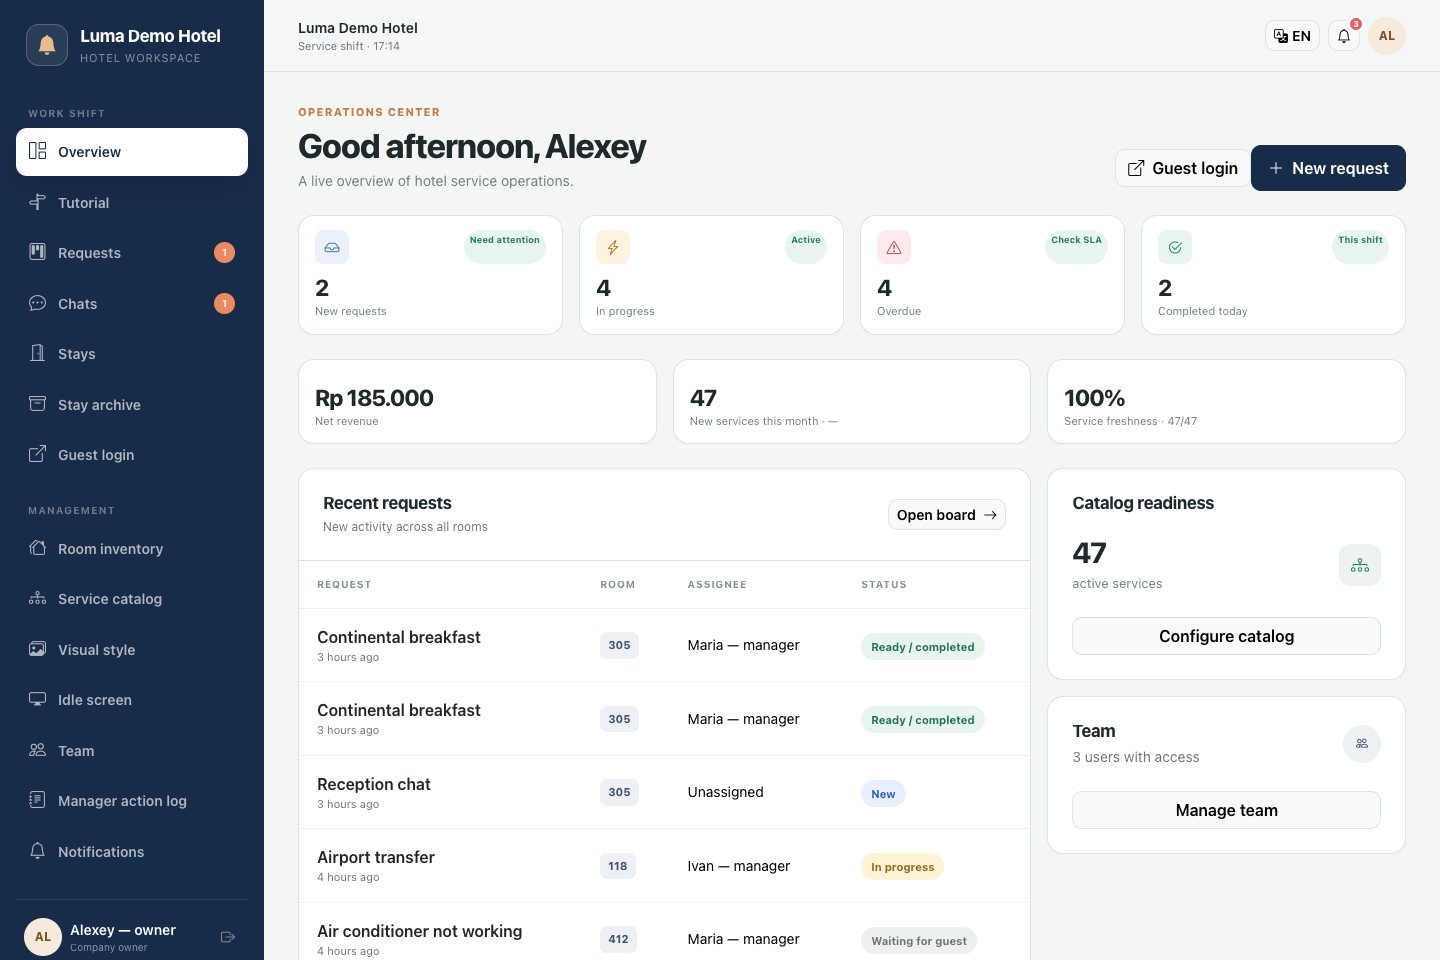
Open the login page and enter your account email and password. The Overview section displays new and active requests, overdue tasks, requests completed today, and recent inquiries.
The dashboard also includes built-in training: it introduces the main sections of the system.
Step 2. Prepare your room inventory
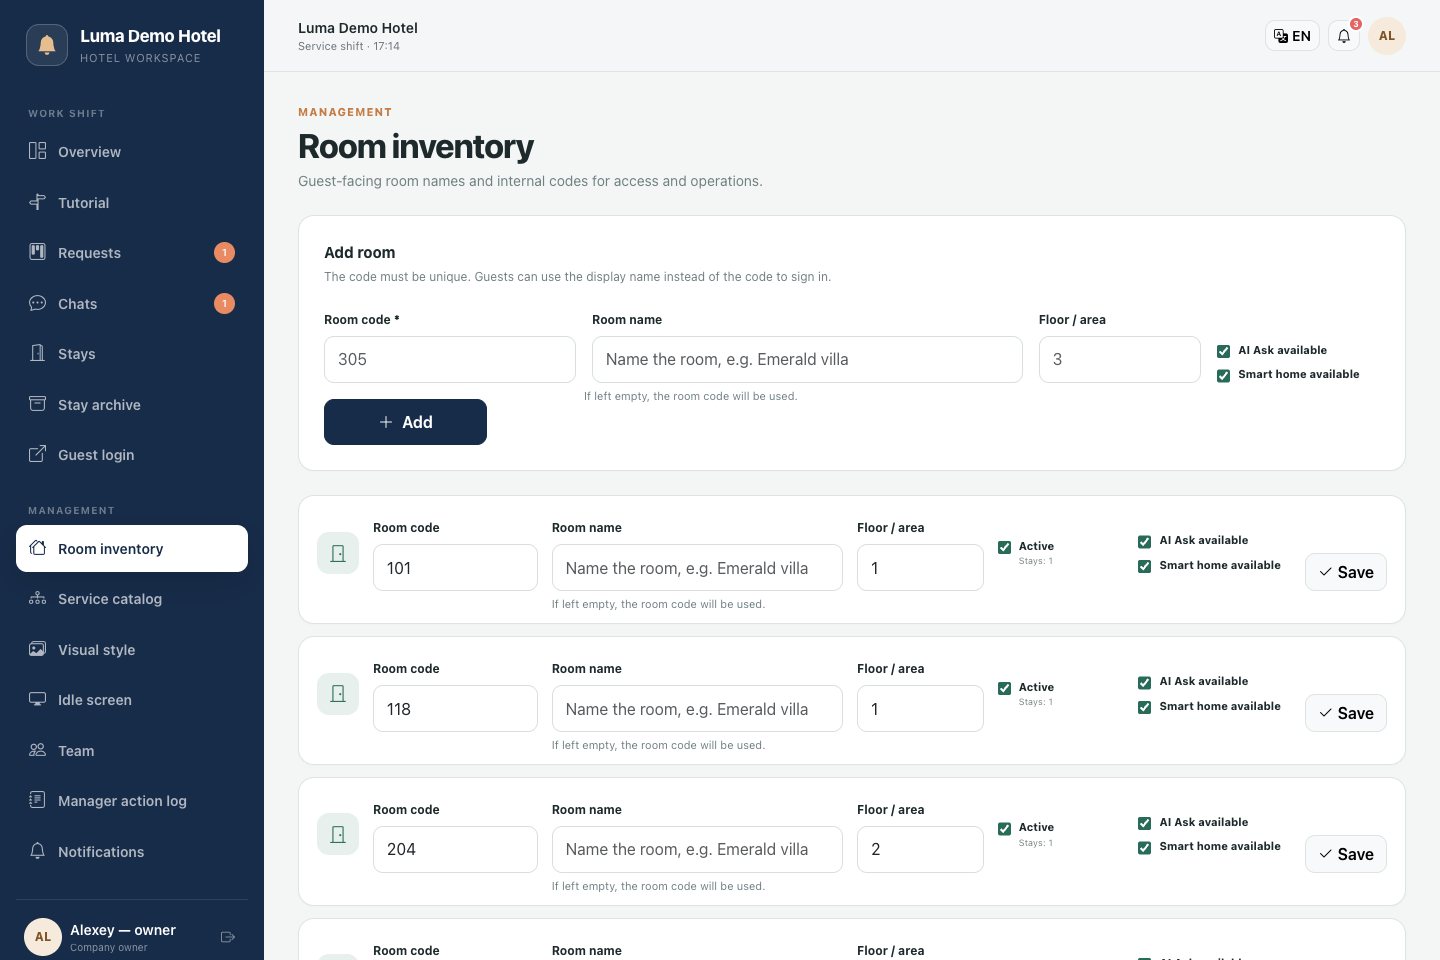
- Open the room inventory section.
- Add the room code, and if needed, the name and floor.
- Make sure the room is active: active rooms are available when creating a stay.
- In the settings of an existing room, enable the additional sections you need — the AI assistant or the demonstration Smart Home panel.
For example, a room might have the code "305" and the name "Ocean Suite", which helps staff and guests navigate more quickly.
Step 3. Add managers
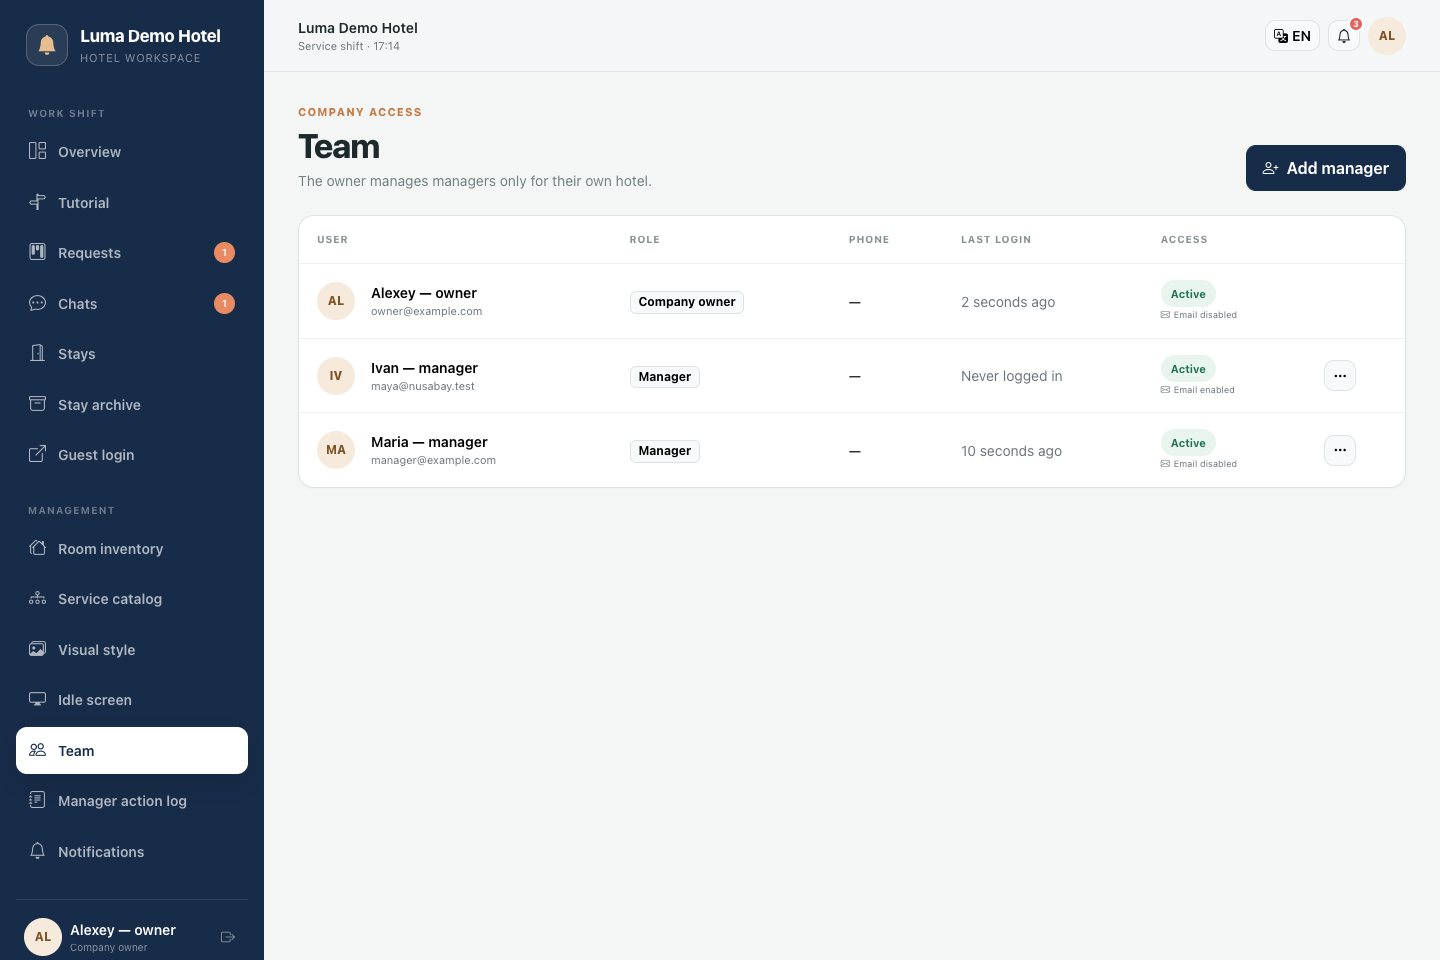
In the Team section, create employee accounts: enter the name, email, password, and its confirmation. If needed, add a phone number, select the interface language, and configure email notifications.
A manager can work with stays, requests, chats, and the service catalog. Team management, room inventory, and the activity log remain with the owner. If an employee should no longer have access, suspend their account in the team section.
Step 4. Build the catalog
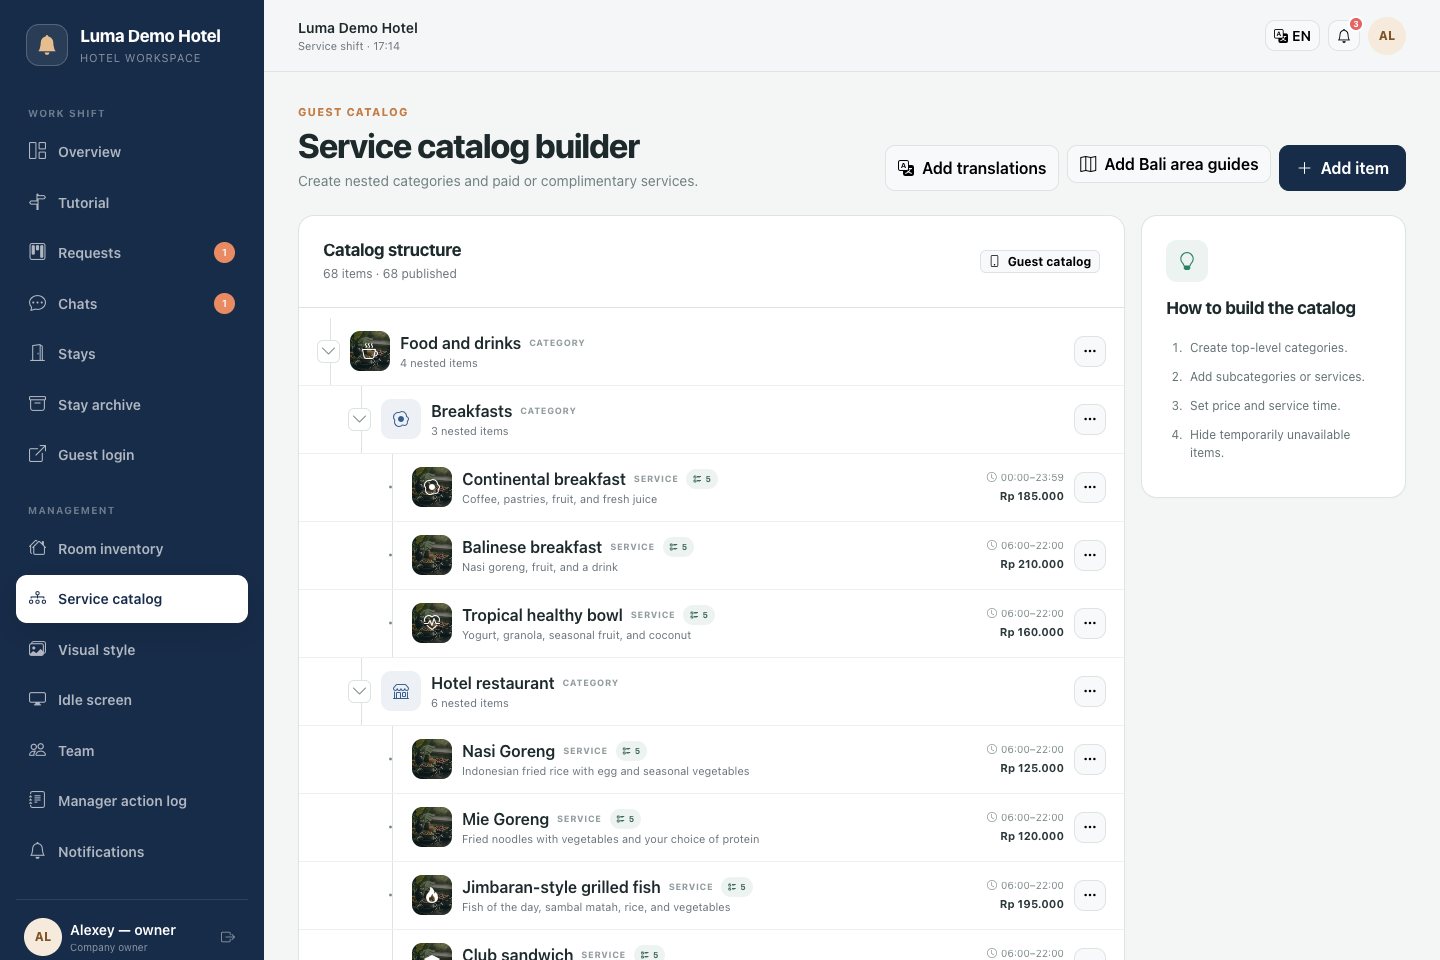
Open the service catalog section. Create categories, then add services or guides to them.
For a service, configure:
- name and description;
- price in the hotel currency;
- estimated completion time;
- availability hours;
- whether advance booking is required and the minimum lead time before service;
- payment method;
- additional options available to the guest;
- background, display order, and visibility for guests.
For example, in the "Transfers" category, you can add "Airport Transfer", set a price, require booking 24 hours in advance, and add a child seat option. This is a setup example: you create the actual set of services yourself.
Add translations of names and descriptions for the languages of your audience. The catalog also offers a translation tool; its operation depends on an external service connection.
Guides let you place informational materials alongside services. The system provides the option to install ready-made Bali guides.
Step 5. Configure the guest interface
On the overview page, select the languages available to guests and staff. The system supports 15 interface languages: Russian, Ukrainian, Indonesian, English, Arabic, Hebrew, Chinese, Korean, Japanese, French, German, Hindi, Spanish, Dutch, and Balinese.
Here you can also change the guest menu address. After changing it, update the links and printed materials that guests use.
In the background library, upload images and select the active set. In the splash screen section, configure images, display time, and transitions. You can link a service to a frame: the guest can open it directly from the splash screen.
Step 6. Test the guest journey
Create a test stay, log in to the guest menu using its code, and submit a request for a free test service. Make sure it appears in the dashboard, accept it for processing, mark it as ready, and confirm completion on the guest side.
This way you can test the entire scenario before working with real guests.
Daily monitoring
On the overview page, check new and overdue requests. In the cards, review the assignee, deadlines, and status history.
The financial summary shows amounts for completed services with the payment status "paid" or "charged to account", taking into account issued refunds. Charging to account does not yet mean money has been received. This summary relates to services recorded in the system and does not replace the hotel's full accounting.
The manager activity log helps trace changes to requests, stays, and the catalog: who performed the action and when.